Last Updated on September 10, 2023 by Ale Monti
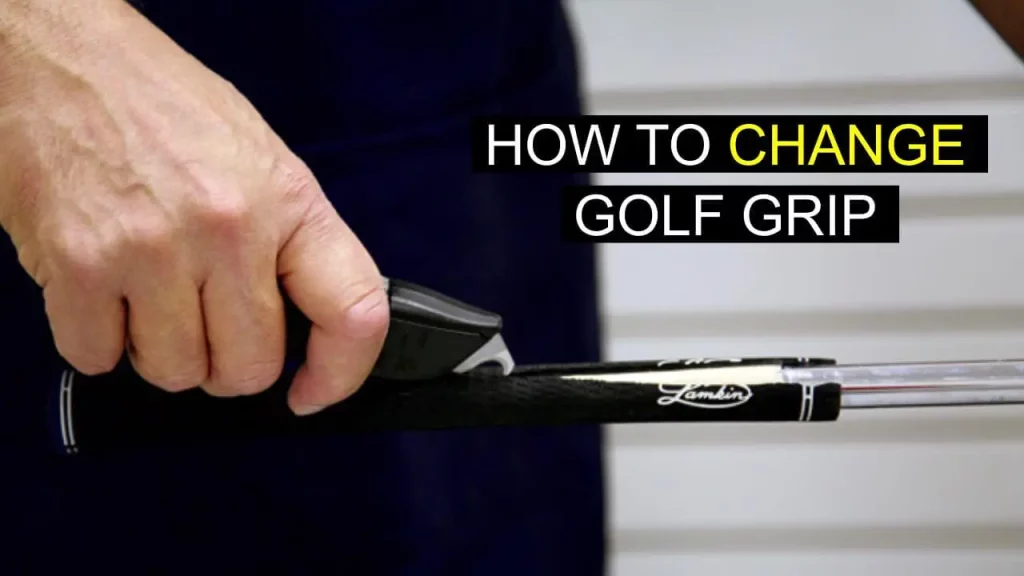
Thinking about how to change your golf grip or how often should we change it? Changing your golf grips is a simple yet effective approach to improve your performance on the course, whether you’re a seasoned golfer or a beginner. And we are hoping that you will be able to do it after reading this simple guide. If you’re a regular on the golf course, you might need to change your grips once a year.
In this article, we will guide you through the process of changing golf grips, ensuring that you have a firm and solid grip on your clubs. Before we get into the specific methods of changing golf grips, let’s start with the basics of preparing your work area and the essential tools and materials you’ll need.
A well-organized workplace and the proper tools will lay the groundwork for grip replacement. So, let’s get started on the journey to improving your golf game by learning how to change golf grips.
| Method | Materials Needed | to be Recommended for | Time Required (Per Club) | Cost | |
| 1. | Cut and Regrip | New grips, grip solvent, double-sided grip tape, vice, utility knife | Beginners, low-budget | 15-30 min | cheap |
| 2. | Air Compressor | New grips, air compressor, grip solvent | For those who have an air compressor | 10-15 min | Bit pricey |
| 3. | Water and Soap | New grips, warm water, liquid soap, bucket, towel | Beginner, on budget | 20-30 min | cheap |
| 4. | Solvent Spray | New grips, grip solvent spray, double-sided grip tape, vice, utility knife | Beginner-friendly, Cost-efficient, but pricey | 15-30 min | Bit pricey |
| 5. | Grip Installer Tool | New grips, grip installer tool, grip solvent, utility knife | Experts or professionals | 10-15 minutes | expensive |
Changing the Golf Grips: Prepare Your Work Area
Before diving into the grip-changing process, it’s crucial to set up the right workspace. Here’s what you need:
- Workspace: Create a nicely lit and clean space where you can work on your clubs comfortably. Adequate lighting ensures you can see the details, and a clean workspace prevents dirt or debris from getting on your grips.
- Protection: Lay a clean towel or mat on your work surface to prevent any damage to the clubheads. This protective layer not only safeguards your clubs but also provides a comfortable surface for the grip-changing process.
By creating the right work environment, you’ll ensure a smooth and efficient grip replacement process for your golf clubs.
Before Installing The New Golf Grip
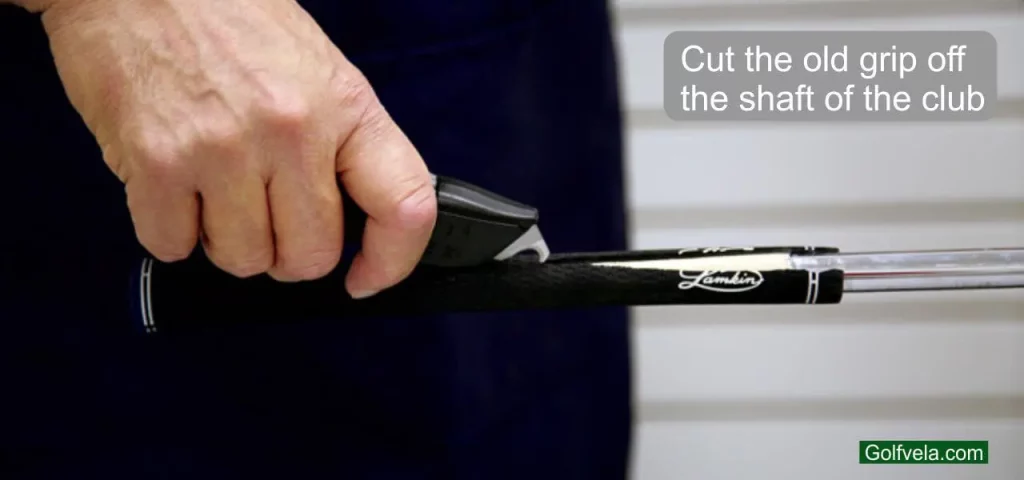
Remove the Old Grip: Begin by using a utility knife or blade to carefully cut the old grip off the shaft of the club. Take utmost caution not to damage the shaft during the removal of old grip. Make straight, controlled cuts, and gradually peel away the old grip.
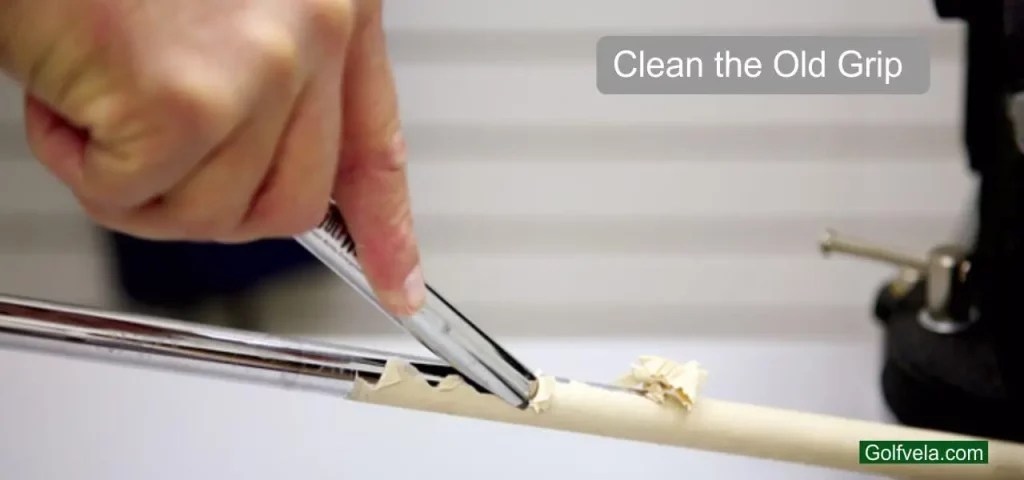
Clean the Shaft: After removing the old grip, use a clean rag and grip solvent to thoroughly clean the shaft of the club. This step is crucial as it removes any residual adhesive or debris left behind by the old grip. Ensure the shaft is completely clean before proceeding.
Different Methods For How To Put On New Golf Grips
We’ll explore five different methods to change golf grips, each with its own advantages and considerations.
Method 1: Cut and Regrip
Materials Needed:
- New grips
- Grip solvent
- Double-sided grip tape
- Vice
- Utility knife
Step-by-Step Process:
Apply Double-Sided Grip Tape: Take the double-sided grip tape and wrap it around the shaft of the club. Apply it evenly, making sure there are no wrinkles or folds in the tape. The tape serves as a secure base for the new grip.
Prepare the New Grip: Pour grip solvent into the new grip, ensuring that it covers the inside of the grip entirely. This step helps the grip slide smoothly onto the shaft.
Install the New Grip: Carefully slide the new grip over the taped shaft of the club, aligning it properly with the clubface. Ensure the grip is pushed down far enough to cover the end of the shaft completely.
Pros
- Economical: This method is cost-effective as it doesn’t require specialized equipment.
- Home-Friendly: It can be performed at home, eliminating the need for a professional club fitting.
- Customizable: Ideal for golfers who prefer a tighter grip, allowing for personalized adjustments.
Cons:
- Manual Labor: It involves some manual labor, particularly during grip removal.
- Time-consuming for Beginners: Novice golfers may find this method time-consuming as it requires precision and practice.
Method 2: Regripping Golf Clubs with Air Compressor Compressor
Materials Needed:
- New grips
- Air compressor
- Grip solvent
- Bucket or container
Step-by-Step Process:
Prepare the New Grip: Pour grip solvent into the new grip and shake it to distribute the solvent evenly within the grip. This step ensures that the grip is well-lubricated and ready for installation.
Use the Air Compressor: Place the open end of the new grip onto the air compressor nozzle. Before turning on the compressor, ensure the grip is securely positioned on the nozzle.
Apply Air Pressure: Switch on the air compressor to fill the grip with air. The produced air pressure is going to help in the grip sliding easily onto the shaft. Maintain a strong hold on the club to let the new grip settle in.
Slide and Align the Grip: As the air pressure pushes the grip onto the shaft, slide the grip along the shaft, aligning it with the clubface. Ensure it’s properly positioned and fits securely.
This method is an efficient way to change golf grips, especially if you have access to an air compressor. It allows for a quick and even grip installation.
Pros:
- Efficient: This method is quick and easy, saving time during grip replacement.
- Minimal Effort: It requires minimal physical effort, making it accessible for most golfers.
- Even Grip: Ensures an even grip installation for consistent performance.
Cons:
- Air Compressor Needed: Access to an air compressor is essential for this method, which might not be readily available to everyone.
- Alignment Challenge: There’s a risk of the grip slipping if not aligned correctly during installation.
Method 3: Water and Soap Method to Change Grips At Home
Materials Needed:
- New grips
- Warm water
- Liquid soap
- Bucket
- Towel
Step-by-Step Process:
Prepare Warm, Soapy Water: Fill a bucket halfway with lukewarm water and add just a few drops of liquid soap.
Soak the New Grip: For a few seconds, soak the new grip in a pail of warm, soapy water. This stage softens the grip, making it easier to glide onto the shaft.
Install the New Grip: Remove the grip from the bucket and slide it onto the shaft. To assist in sliding the grip, use a towel to grip the club and twist the grip into place. Ensure that it’s securely positioned on the shaft.
Align the Grip: Align the grip with the clubface, ensuring that it’s in the desired position for your grip style.
Pros:
- Cost-effective
- Ensures an even grip
Cons:
- Can be time-consuming
- Requires more drying time than other methods
You can also read in detail about How to change golf grips without vise.
Method 4: Golf Grip Solvent Method
Materials Needed:
- New grips
- Grip solvent spray
- Double-sided grip tape
- Vice
- Utility knife
Step-by-Step Process:
Apply Double-Sided Grip Tape: Cover the shaft of the club with double-sided grip tape, making sure it’s evenly distributed and wrinkle-free. The tape provides a stable foundation for the improved grip.
Spray Grip Solvent: Spray the grip solvent onto the tape and inside the new grip. This step ensures that the grip will slide smoothly onto the taped shaft and adhere effectively.
Installing the New Grip: Glide the new grip over the club’s taped shaft, twisting and pressing it into position. Ensure that the grip is securely in place and appropriately aligned with the clubface.
Align the Grip: Align the grip with the clubface, ensuring it’s in the desired position for your grip style.
Pros:
- Quick and easy
- Ensures an even grip
Cons:
- Requires grip solvent spray
- The grip may slip if not aligned properly
Method 5: Grip Installer Tool Method
Materials Needed:
- New grips
- Grip installer tool
- Grip solvent
- Utility knife
Step-by-Step Process:
Apply Grip Solvent: Grip solvent should be applied on the tape and within the new grip. This step ensures that the grip will slide smoothly onto the taped shaft and adhere effectively.
Prepare the Grip Installer Tool: Insert the grip installer tool into the open end of the new grip. Ensure it is securely positioned.
Install the New Grip: Slide the new grip, with the grip installer tool inside, over the taped shaft of the club. Twist and push the grip into place, using the tool to guide and ease the installation.
Remove the Grip Installer Tool: After the grip is securely in place, carefully remove the grip installer tool from the inside of the grip. Ensure that the grip remains correctly positioned on the shaft.
Align the Grip: Align the grip with the clubface, ensuring that it’s in the desired position for your grip style.
Pros:
- Quick and easy
- Ensures an even grip
- Good for those who want a professional-looking finish
Cons:
- Requires a specialized tool: You’ll need a grip installer tool, which is an additional expense.
- Higher cost than other methods: The tool adds to the overall cost of grip replacement.
Steps After Installing A New Golf Grip
Secure the New Grip
It is critical for your golf game that the new grip be correctly installed. You can achieve this by using a grip clamp or simply using your hands to push the grip firmly onto the shaft. Make sure a small amount of the grip extends beyond the club’s butt for comfort.
Clean Up
After successfully changing the grip, it’s essential to tidy up your workspace. Here’s what you need to do:
- Trim any excess tape sticking out from the grip with a utility knife.
- Wipe away any excess solvent or tape residue with a clean cloth or paper towel.
Let the Grip Set
Allow the grip to rest for at least 24 hours for the grip to set in place. This waiting period is essential as it ensures the grip adheres properly to the shaft, providing you with a secure and reliable grip during your game. For more details, you can read about How Long do Golf Grips Take To Dry.
Test the New Grip
Before heading to the course, it’s good practice to test the new grip. Take your club to a driving range or course and ensure it feels comfortable and secure in your hands. This step will help you get used to the new grip and make any necessary adjustments.
How to Measure for Golf Grips
Measuring for golf grips is an important step in ensuring you have the right size grips on your clubs, which can influence your golf performance. To find the proper grip size for your requirements, follow these easy steps:
Required tools:
- Golf club(s)
- Ruler or measuring tape
- Golf grip sizing chart (optional)
Steps to measure:
Hold the Club Naturally: Just grip your golf club like you normally would when you’re getting ready to swing. Make sure your grip feels comfortable, not too tight or too loose.
Measure Your Hand: Get a ruler or a tape measure. Measure from where your wrist creases (where your wrist meets your hand) to the tip of your middle finger. Make sure to note down measurements in inches or centimeters.
Check the Sizing Chart: Some golf grip brands have charts that help you match your hand measurement to grip sizes. Look for one and find the grip size they recommend based on your measurement.
Find Your Size: Use your hand measurement and the chart to figure out which grip size suits you. You’ll see options like undersize, standard, midsize, and oversize (jumbo). Standard is what most people use. For more details, you can read about What Size Golf Grips Do I Need?
Think About Comfort: While the chart is helpful, choose what feels right to you. Some golfers might like a slightly bigger or smaller grip based on their comfort and playing style.
Test It Out: If you can, visit a golf store where they have clubs with different grip sizes. Try them out to determine which one feels the most comfortable and provides the most control.
Ask an Expert (Optional): If you’re still unsure or want personal advice, talk to a golf club expert or a pro. They can look at your swing and hand size to suggest the perfect grip size for you.
You can simply determine the appropriate grip size for your golf clubs by following these instructions. This ensures a comfortable and effective golfing experience, whether you’re getting new clubs or changing grips on your existing ones.
Conclusion
Changing your golf grips is a straightforward way to boost your golf game. Whether you’re a seasoned golfer or a newbie, this guide has equipped you with the knowledge to do it right. If you play regularly, consider changing your grips once a year for optimal performance.
Remember that the appropriate grip can either make or break your game. Whether you choose the cut and regrip, air compressor, water and soap, solvent spray, or grip installer tool method, you’ve got the tools to do it yourself. Afterward, secure the grip, tidy up, and let it set for 24 hours. Then, test it out on the course to fine-tune your game. How to change golf grips is an easy and dedicated task that needs your time and effort.
Frequently Asked Questions
Q1: How frequently should I replace my golf grips?
Golf grips normally last approximately 1-2 years, depending on how frequently you play and how your clubs are stored. If you see symptoms of wear and tear, such as cracks or lack of tackiness, it’s time to change them.
Q2: Should I change my golf grips at home or seek expert assistance?
If you have the necessary equipment and follow the instructions carefully, you can change golf grips at home. However, if you’re unsure or want a professional finish, seeking assistance from a golf club technician is a good option.
Q3: Do I need to change all my grips at once?
It’s not necessary to change all your grips simultaneously. You can start by changing the grips on clubs you use most frequently or those showing signs of wear. You can gradually replace the grips on the rest of your clubs.
Q4: How to Grip a Golf Club Right-Handed?
For right-hand golfers, the most commonly used grip is the “Vardon” or “overlap” grip. Place the club’s grip in your left hand, wrap your fingers around it, then position your right hand’s pinky between your left hand’s fingers. Maintain a light grip with thumbs pointing down the shaft and palms facing each other for better control.
Q:5 How Far Should You Grip a Golf Club?
Gripping down on the golf club means holding it a bit lower on the handle. It can help with control and aim. How much to grip down depends on your shot and what feels right for you. So, try different positions to find your best grip when playing golf.